The AluK Veranda is supplied in kit form in a choice of colours and with the option to install either a glass or polycarbonate roof. Clever design features include invisible fixings, rainwater downpipes integrated within the posts, adjustable roof pitches and LED lighting in the rafters if required. There is also a special ordering tool which automatically calculates the roof pitch and glass sizes required.
With lots of stylish sales and marketing material available and an easy to use app which means homeowners can see a visualisation of how the Veranda would like on their own property, AluK has worked hard to make it a relatively easy sell to customers who want to make more of their outdoor space.
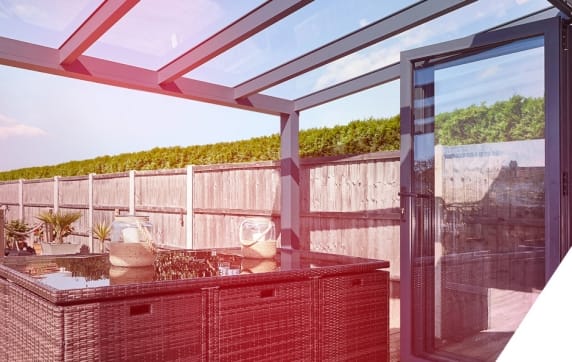
From an installer’s perspective though, probably the biggest benefit of the AluK Veranda is that it is quick and easy to fit on site in less than a day, maximising returns and minimising hassle.
AluK has produced a video, shot at its training Academy in Chepstow, which shows just how easy the process is. Step by step, it starts with the delivery and inspection of the kit and then shows how quickly everything comes together once the foundations are in place and there is a connection to a water drainage outlet or a planned soakaway available.
Step 1: Prepare the wall plate
The first step is to unclip the closure profiles and position the end brackets and the rafter brackets at 500mm intervals on the wall plate.
Step 2: Fix of the wall plate
With the brackets fixed in pace, the wall plate itself is then fixed to the structure, before sealant is applied to the top edge and the end caps fitted.
Step 3: Fix the gutter
The next step is to attach the gutter post bracket to the under side of the ring beam.
Then, the posts themselves can be measured and the position of the posts marked on the ground to determine where the brackets for these need to be located on the beam.
Step 4: Fix the footplates and posts
Footplates need to be secured to the posts to create a base to fix to the foundations and the posts themselves can then be fixed to the ring beam, with the level of the gutter adjusted as required.
Step 5: Preparation of the rafters
Each of the rafters has end cap screws inserted, although these don’t need to be tightened too much at this stage.
Step 6: Fix the end rafters
The two end rafters are slotted into the brackets on the wall plate and then fixed at opposite ends of the ring beam profile.
Step 7: Fix the posts to the foundation
Once the structure is square and level, the end cap screws of the rafters can be fully tightened. Then, the footplates can be fixed to the foundation and the downpipe attached to the gutter leading directly to the drain or soakaway. This is concealed behind a clip-on cover.
Step 8: Fix the remaining rafters
An inner closure plate on the wall plate acts as a spacer to ensure that the remaining rafters are positioned accurately before they are also fixed to the ring beam.
Step 9: Fit the glazing panels
Glazed or polycarbonate panels are then fitted to the roof, ensuring that the condensate profile strips provided are attached on polycarbonate panels to provide an adequate ventilation gap.
Step 10: Finishing touches
End caps are attached to the ring beam, gutter and rafters to ensure a neat finish, and the gasket is applied to the wall profile to the height of the face gap.
AluK’s 10-minute video demonstrates perfectly how the whole process can be carried out by two men in less than a day. Installers can book themselves a free Veranda training session at the AluK Academy via the website at: www.alukacademy.co.uk and find more details on the Veranda system here.